
With school beginning soon, and a couple of my friends recently welcoming third babies to the family, helping the older kids to learn to prepare their own meals and snacks has become a hot topic of conversation.
It all started when one of my friends sent me this facebook link and we all started to chime in on how the system would or wouldn’t work for us and what we might do differently.
Today we’re starting off with snack stations. Hope you get some great ideas and we’d love to hear from you if you have your own techniques that are working well!
One of the many benefits of growing children is their growing independence. The overwhelming tasks of feeding and changing little ones gets easier every year.
Diapers turn to potty training and bottles turn to solid food. Pretty soon they are able to feed themselves and the next thing you know, you have finger prints all over your pantry.
As my kids have grown, I have noticed their growing desire to become independent in their eating. When they’re hungry, they scrounge around and come up with a snack. But, I’m still the parent, so I want to guide them and help them make healthy choices while still maintaining their independence.
A snack station has been a huge help during the summer, on the weekends and after school during the year.
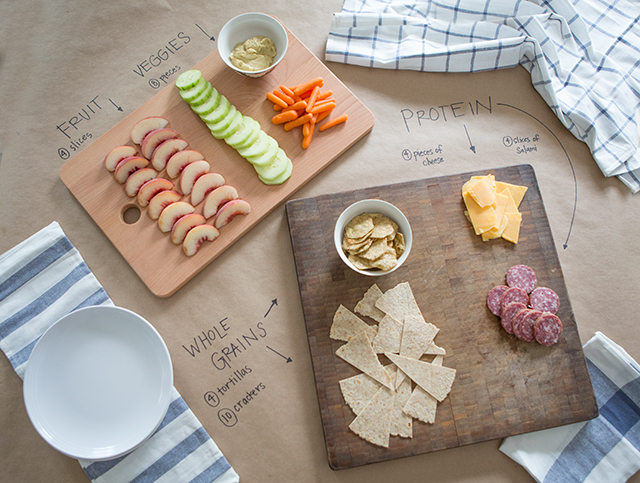
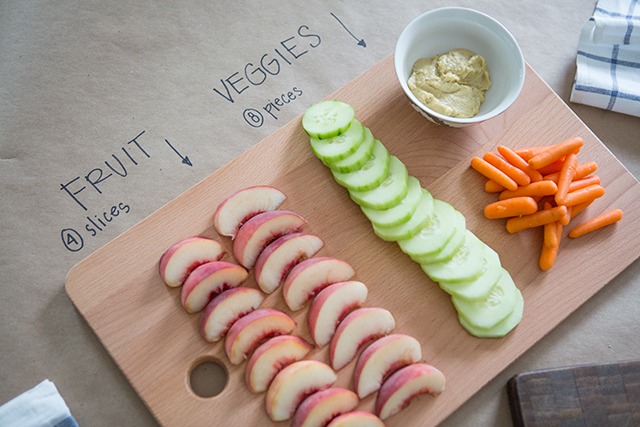
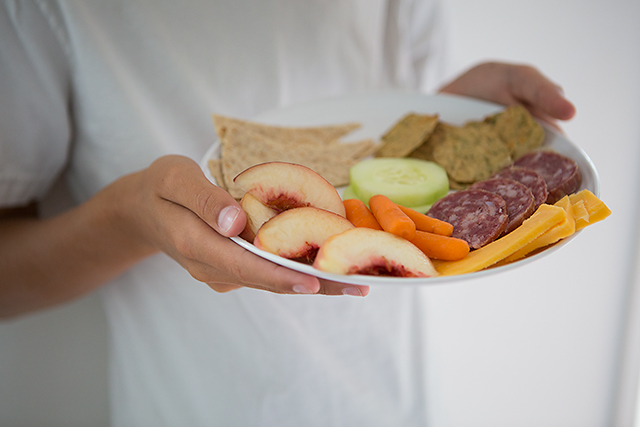
I choose one or two (depending on how many kids are eating and how hungry they are) of each of the following categories: Whole Grains, Protein, Fruit and Vegetables.
The kids can serve themselves and snack away.
Tips for Creating a Snack Station
Choose the type of food you will serve
Don’t over complicate this. It should be easy, but not necessarily pre-made. If you have applesauce cups (for example), you can put those out. If you don’t, just cut up some fruit.
Select the serving size
This is going to depend on how many kids are snacking, how old they are and what type of snack this is. If they had a small lunch, you might want to offer two options for several of the food categories or choose a larger serving size.
If this is just a ‘tide-you-over-till dinner’ snack, modify it to one fruit or vegetable and a protein.
The serving sizes help children start to have healthy eating habits. It also encourages them to try new things.
Your carb lovers will be more apt to try a piece of salami with their cracker and your fruit-only kids will venture out to try a veggie in some dip.
Display the snack well
You’ve heard that we eat with our eyes first? It’s true. If food is presented well, it looks appetizing.
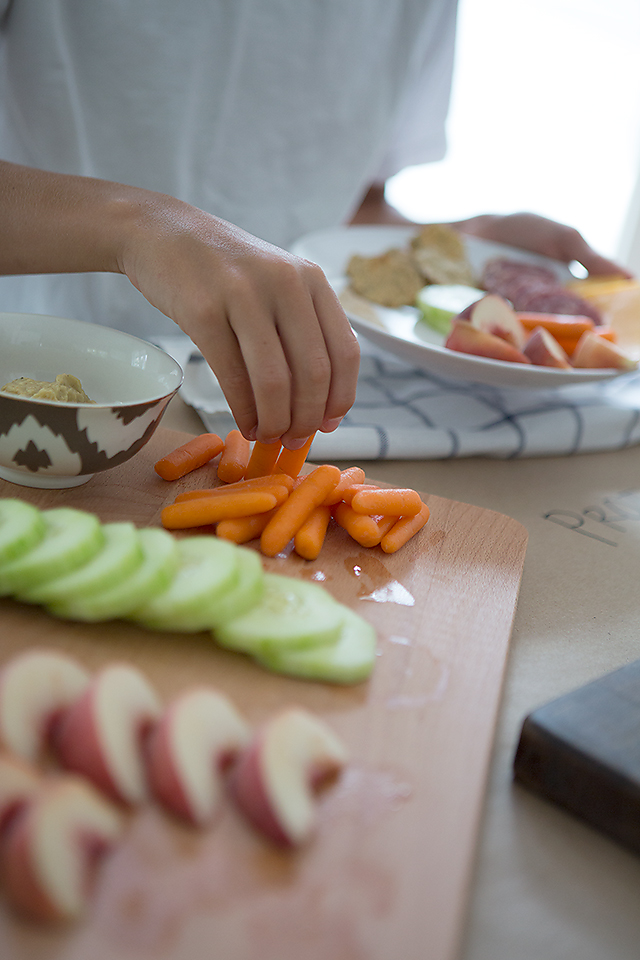
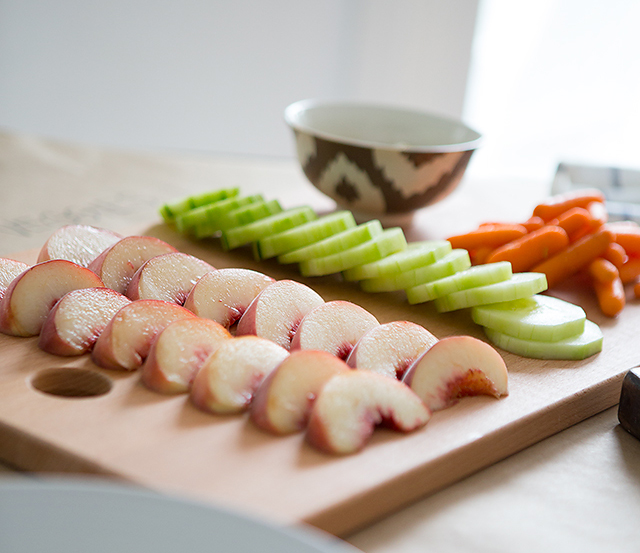
Bite size chunks nicely laid out just make you want to eat a peach more than if it’s sitting whole in a bowl on the counter. So, channel your inner chef and make it look pretty.
Aim for easy clean-up
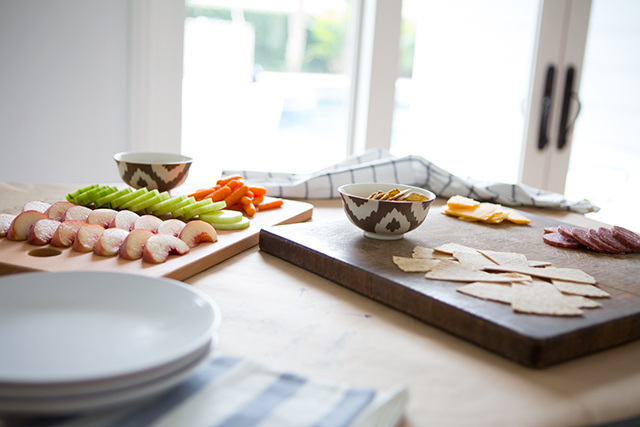
I love to use my cutting boards to display my snacks for several reasons. It’s one thing to wash instead of several bowls and plates. It also lets me cut them on the board and arrange them there instead of transferring them to another dish.
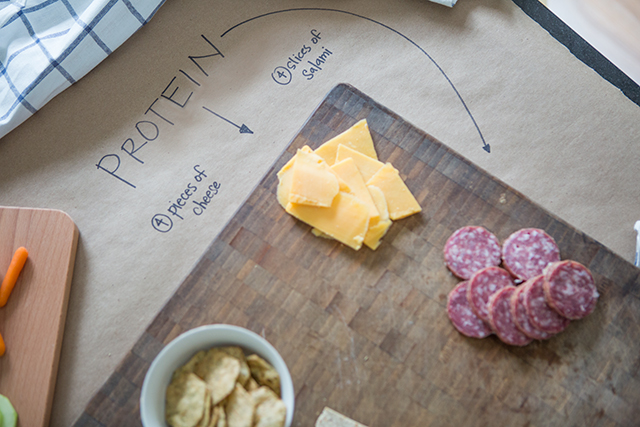
I place the boards on a piece of kraft paper on my table. It’s easy to write the serving sizes (how many pieces or slices) on the paper and when we’re done, I just wrap up all the crumbs and everything goes straight to the trash.
Ideas for the Snack Stations
Whole Grains– Tortillas, crackers, popcorn, toast, rice cakes, cereal
Protein– Cheeses of all types, salami, beef jerky, cubed chicken, nut butters, hummus dip, beans
Fruit– Anything that’s in season. (You can save time with pre-cut fruit and cups of fruit, but look out for added sugar.)
Vegetables– Anything that’s in season. (Remember to cut into small pieces, because vegetables can be a hard-sell but, small bite-size pieces make them more palatable.)
More Healthy Snack Ideas:
Three Dips to Get the Kids to Eat More Vegetables
23 Healthy Homemade Kid Snacks
Healthy Drinks: 7 Days of Fruit-Infused Sparkling Water
Get Your Free Printable

Subscribe to our newsletter today and get our free printable... No More, "Mom, I'm Bored!"