Modern Parents Messy Kids

We're all about finding ways to make family life better while keeping our sense of humor. Check out our famous MPMK Top Toy Awards, already viewed over 7,000,000 times!

  • Start Here
  • Travel
  • The Kids
    • Our Famous Toy Gift Guides
    • Play Activities & Art Ideas
  • The Home
    • In the Kitchen
    • Project Organize Your ENTIRE Life
      • Cleaning House
      • Meal Planning
      • Decluttering
      • Organizing
      • Schedules & To Do Lists
      • Daily Rhythms
    • The Holidays
    • Photography & Memory Keeping
  • Parenting
    • Parenting Discussions
    • Happy Family Habits
    • The Book Nook
    • Mom Health & Beauty
You are here: Home / The Make & Play Vault / Special Series / Natural Outdoor Play Spaces / How to Build a Sandbox… Finally!

How to Build a Sandbox… Finally!

May 29 by Steph (MPMK Founder)

Step by step instructions on how to build a sandbox the kids will play with for hours!
Hey friends.  We’re still working furiously to get our home ready to put on the market this week, but I haven’t forgotten about you! Since I didn’t get around to posting about our DIY sandbox until the end of the summer when it first debuted – I thought I’d get ahead of the game this year and post it now.  You know, so you could build it and actually enjoy it all summer.


It’s a good project – you should totally do it if you have the space.  Young House Love even based their sandbox on our design (she says with her chest puffed out in pride like some kind of psychotic rooster).  Here’s the details and LOTS of photos too…
Remember way back here, when I mentioned we were building a sandbox and promised details?  Surprise, I didn’t forget about you!  I’m so sorry, my dear friends, that it’s taken me so long to post on our favorite backyard toy.  The problem was summer got away from us, as it often does, and I just didn’t have time to do all the photo editing needed for this one.


I contemplated waiting to post this until next summer but I hear there are lots of people still experiencing summer warmth around the country (insert Seattle bitterness here).  Also, I’m so appreciative of all the time and effort that my husband put into the project that I couldn’t resist showing off his hard work.  Because there are SO MANY photos in this one, I’m keeping the commentary to a minimum and trying to let the pics speak for themselves (but feel free to ask questions in the comments if you have them) – enjoy!

P.S. – Please excuse the mess!  You may recall, we’re still recovering from this.  Our fence was step 1 and this was step 2.

Measure out where you want to put your sandbox to be sure it fits.  (Ours was a six foot square.)  Place stakes at the corners to mark where you need to dig.

Dig a hole in each corner for the support beams.

Cut your four sides to size.  We used 4 pieces that were 6′ x 1′ each.

This is what it should look like once the posts are in the ground.  For reference, our posts were 2 feet tall.


Once things are lined up and level, screw it all together.

You’re probably wondering why my husband didn’t just assemble it in the ground.  Initially we had planned to put benches on top of the posts so he wanted to ensure they were screwed to the sides at the exact same height (to make everything perfectly square… He’s picky like that).  We eventually nixed the benches though, deciding that the underside would be too inviting for spiders.

Use a sledge hammer to make it level and sturdy in the ground.

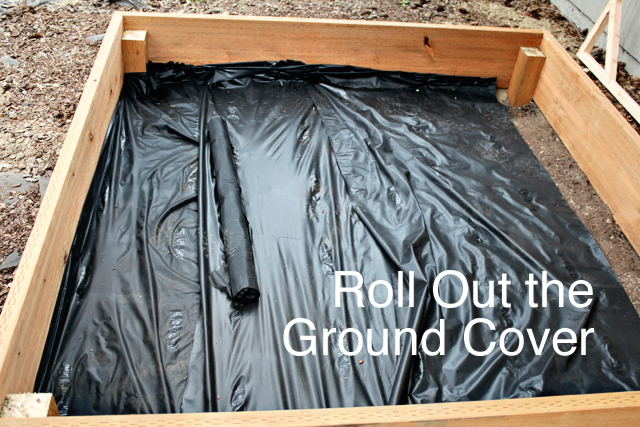
 An essential step for preventing weeds!


And by “nails”, I mean “staples” – I’m just too lazy to fix it in Photoshop.

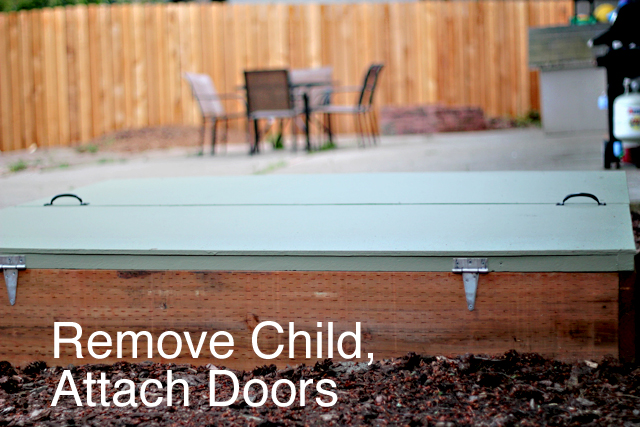
We decided a bi-fold style cover would be easiest to lift.  Each side was framed out using 2″ x 2″ pieces and 1/2″ plywood was mounted on top.

A nice earthy green to match all the nature – two coats of primer and two coats of paint.

To C any big amount is “five”, so this is him conveying that we got A LOT of sand.

And he was right… 35 bags at 50 lbs. each, you do the math.

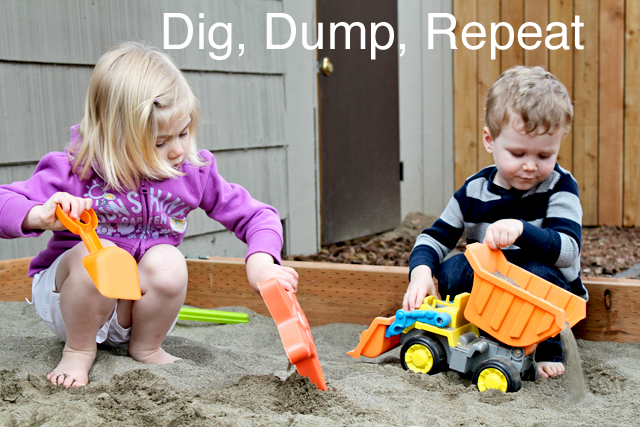
You can tell by the framing still in the background, we hadn’t attached the cover at this point but once the sand went in C was too excited to be deterred from trying it out.


Two doors, some large hinges, a pair of handles and the sandbox was complete.


We’ve been enjoying our sandbox for months now and it was one of the best investments we’ve ever made.  We thought briefly about buying a swing set instead but you gotta know your kid… ours never tires of playing with trucks.

Similar Stuff: DIY Creativity Center (Toddler-Friendly & Baby-Proof)

P.S. Don’t forget to get our tips on getting out with the kids this summer and enter our giveaway for over $70 in goodies!

OXO Tot giveaway

Get Your Free Printable

Subscribe to our newsletter today and get our free printable... No More, "Mom, I'm Bored!"

Success! Now check your email to get your No More "Mom, I'm Bored!" Printable... Refer to it whenever the kids get restless!

There was an error submitting your subscription. Please try again.

Powered by Kit
Share
Pin2K
2K Shares

Filed Under: Natural Outdoor Play Spaces, Outdoor Play, The Make & Play Vault Tagged With: DIY sandbox, homemade sandbox, how to build a sand box, how to build a sandbox

Get your kids' kit

  • Facebook
  • Instagram
  • Pinterest
  • xing

Finally Get Organized

Our Famous Gift Guides

MPMK's Famous Gift Guides

Find the Perfect Toy!

Copyright © 2025 · Parallax Pro Theme on Genesis Framework · WordPress · Log in

Web Design & Hosting Servously.com