If you’ve been to your local craft store recently, you’ve probably noticed the sudden abundance of cheesecloth available on the shelves. The thin, gauze-like material has been a Halloween crafting staple for decades and for good reason.
It’s a very user-friendly material for both kids and adults to work with and it’s appearance naturally lends itself to ghost and mummy projects galore.
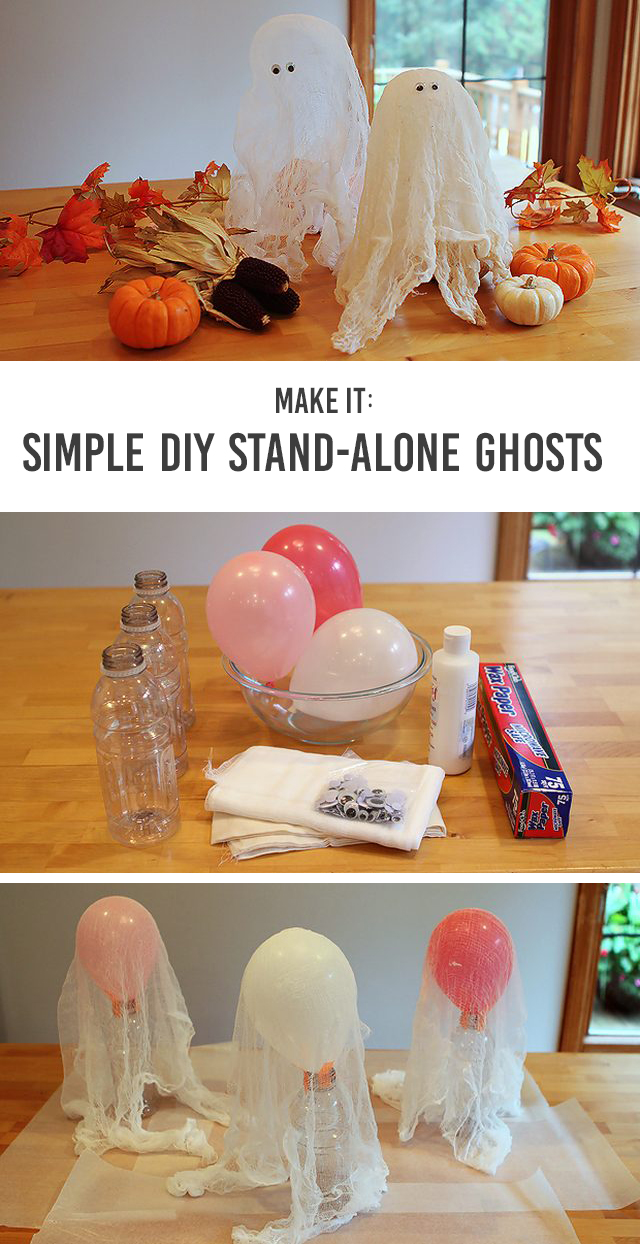
Today we’re giving you the quick and easy steps involved in making some spooky spirits that you can hang from the ceiling or rest on a bookshelf.
Either way, these guys are sure to add to the Halloween spirit around your house.

Materials
For this project, you will need:
- cheesecloth
- googly eyes
- fabric stiffener
- a large bowl
- a small round object (we used water balloons)
- a cup or bottle to support the round object
- wax paper
- tape
- scissors

Instructions
Prep your surface by covering it with a few sheets of wax paper. Next, line up your cups or bottles and use several pieces of tape to secure the balloons to the top.

Now for the part the kids will love.
Drape your cheesecloth over the balloon and measure how long your piece needs to be, then cut. Keep in mind that if your ghosts will be standing, then you’ll want some of the material to pool at the bottom.
Place the cut piece of cheesecloth in a bowl and cover with enough fabric stiffener to soak all of the fabric. Use your hands to massage the liquid into the cheesecloth.

Gently drape the wet cheesecloth over the top of the balloon to form the ghost’s body. You can either stop with one layer or add a second depending on how transparent you’d like your ghost to be.

Let the cheesecloth dry for about 6 hours, then remove it from the balloon and secure a set of goggly eyes to the front.
Now you can either place the ghosts standing up or use fishing line to hand them from the ceiling.
A group of ghosts makes for an impressive outdoor display too, just make sure they won’t be exposed to any harsh weather.
*Post contains affiliate links.
More MPMK Halloween Crafts
Duct Tape “Wicked” Inspired Doormat
Halloween Paper Bag Luminaries
Simple Outdoor Halloween Garland
Get Your Free Printable

Subscribe to our newsletter today and get our free printable... No More, "Mom, I'm Bored!"