
Every year I get a little blindsided by Easter.
Halloween I totally equate with lots of candy and general sugar overload, for sure. But when it comes to Easter, I think of dying boiled eggs and a big fancy brunch. What I always fail to remember, until it’s upon me, are the mass amounts of chocolate my littles collect over the holiday, mainly at the neighborhood Easter egg hunt.
Fortunately, my 6 and 4 year olds are slightly obsessed with experiments of all varieties right now and, it turns out, candy is a great medium for an afternoon of kitchen science fun.
So instead of eating all of those M&Ms and jelly beans this year, why not join us in cooking up a few colorful concoctions?
We put the scientific method to work with the following classic experiment. The only thing you need besides your candy for this one is water, but we used sparkling water because a) bubbles make everything more fun and b) extra fizz makes it feel more science-y.
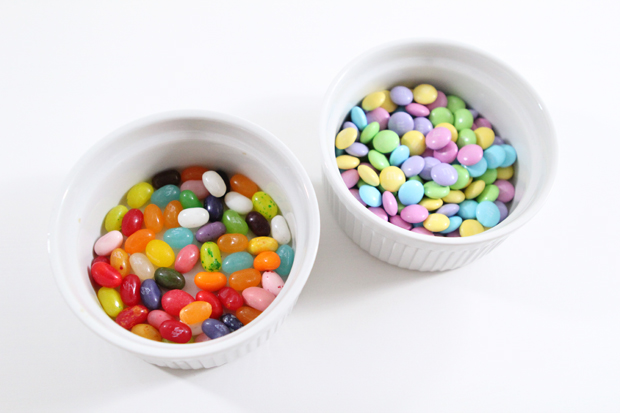
First things first, the candy had to be sorted – first by type…

And then by color. Then it was time for our very informal version of the scientific method:
Step 1: Observation & Ask a Question
When looking at our candy, the biggest thing that we noticed that there were a lot of bright colors present, and also that there were white “m”s on all of the candy.
Our question was, what would happen to these bright colors and the letter “M” when water was added?
Step 2: Hypothesis
The kids and I hypothesized that because the candy shells were made of sugar, and sugar dissolves in water:
- The colors and “m” would dissolve off of the candy.
- The bright colors of the candy would tint the water the same hue.
- When two colors of candy were put into the same container of water, the colors would leak and mix to form new colors.
Step 3: Experiment
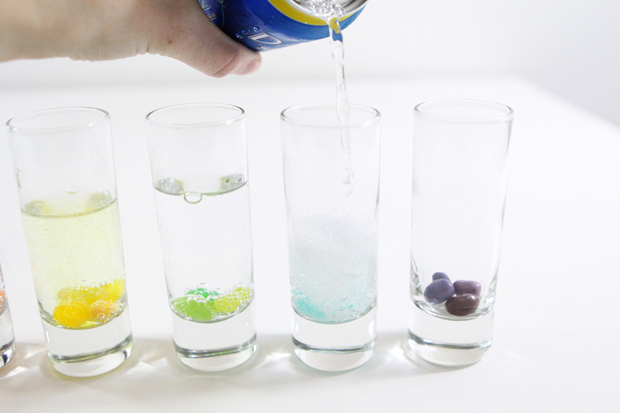
After sorting the jelly beans by color, we proceeded to add sparkling water to each container. You can see that before we were even through pouring, the yellow jelly beans had already begun to tint their water.
Once the “beakers” (definitely NOT shot glasses) were full, we put them aside while we moved on to part two of the experiment.

This time we added two groups of different colored M&Ms in a container with sparkling water. You can see that, like the jelly means, the color on the M&Ms also began to bleed of off the candy and into the water almost immediately.
Step 4: Analyze
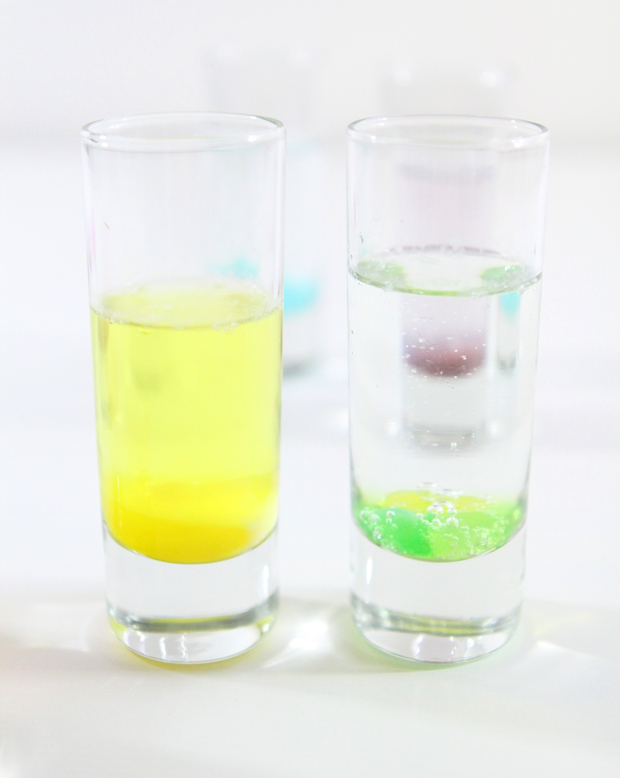
The kids noticed right away that the color of the jelly bean had a huge effect on how much it tinted the water – something we didn’t predict!

They also noticed the “naked” jelly beans at the bottom of the beakers.
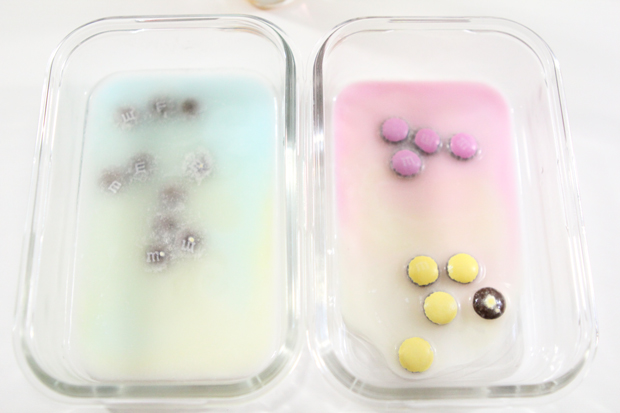
Lastly, we returned to our M&Ms and saw that the colors were mixing to create new colors (blue and yellow making green and pink and yellow making orange) as we predicted.
The kids also noticed that in the dish on the left, the “m”s were still visible even though the colored shells were gone – another result we didn’t predict.
Step 5: Conclusion
When we were all through we concluded that our hypothesis had been largely correct, although we were curious as to why those “m”s hung around and why some colors of jelly beans colored the water so much more than others – jumping off points for experiments for another day.
As you can see, our approach to the scientific method was very basic, but it was a great introduction for the kids and they loved it.
So much so that they didn’t even complain about not getting to eat the Easter candy. Score one for mom.
More MPMK Kitchen Science Ideas:
The Kitchen Experiment Garden: Growing Plants from Food Scraps
Elephant Toothpaste Experiment
Get Your Free Printable

Subscribe to our newsletter today and get our free printable... No More, "Mom, I'm Bored!"