
Kristin, one of our professional photog contributor’s here, is back today with another super helpful iPhone camera tutorial. I’ve always wondered how to use those fancy tiltshift apps with my iPhone but have been too intimidated/busy to really explore them.
I’m super excited to have Kristin here to add to our Photography and Memory Keeping category by de-mystifying it all and show us exactly what we need to know to jump in and start using the feature today.
Have you ever noticed that when you take photos with your iPhone they look flat?
The reason is that everything in the photo is in focus. People love fancy cameras because they can adjust the aperture, meaning the child is in focus and the trees behind them are soft and blurry. We are drawn to these types of photos because that’s how our eye sees.
If you look at your child, your eye focuses and everything behind the child is out of focus. While the iPhone camera takes a quality photo, it’s not able to create the depth of field that happens when you can adjust aperture.

But, that doesn’t mean all the photos taken on your iPhone have to be flat. You can use an app, like TiltShift Generator to create the look of a photo that isn’t all in focus. The app is 99 cents and can really add that contrast to your photos.
So what does a tilt shift do? Tilt shift lenses were created in the 1960’s for photographing architecture. If you take a photo of a building, the wall lines are not straight in the photo. The lens shifts downward to avoid the distortion that makes walls look slanted and tilts the vertical axis, resulting in a very small region of the photo appearing sharp.
Portrait photographers started using the lenses for photographing people instead of buildings to create a unique portrait where the subject was in focus and the background sort of tilted and blurred around them.

Some photos work better than others for the tilt shift affect.
I like to use photos that have a lot going on and one single subject or subject area.
The single subject is in focus and everything else around it commands attention back to the subject for a dramatic affect. I also love using the affect on food photos.

Sometimes food photos can be boring.
By creating a central focus point the eye is drawn to the detail of the food instead of the entire plate.
Landscapes are also enhanced by a tilt shift affect. In this photo, I chose a central spot for focus and the details around soften into a pretty blur.

The TiltShift Generator app allows you to choose between 3 different shapes for the focus point (circle, oval and rectangle). I’ve noticed that I like using the circle and the oval for photos with people and the rectangle for food photos and landscapes.
You can adjust the size of the shapes depending on the area that you want in focus. You can also adjust where on the screen you want the focus to be and also how blurred you want the background to be.
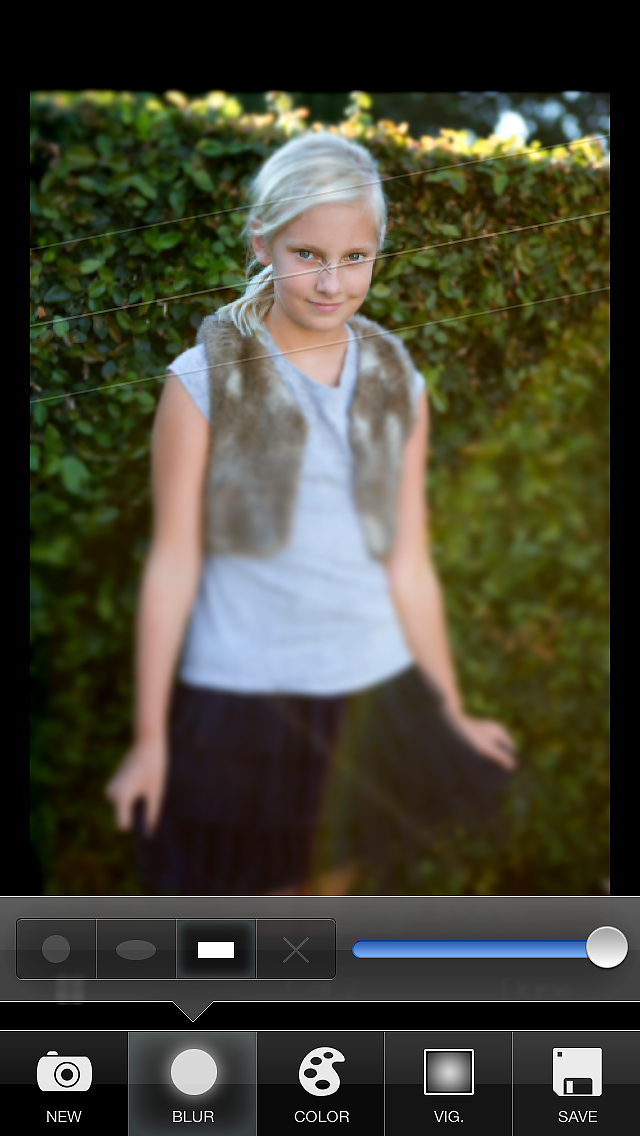
You can also adjust color and add a vignette, then save the photo to your phone or share with social media.
It’s a lot of fun to add some creative affects to your photos and totally worth the 99 cents! And speaking of totally worth the money, did you hear?
Amazon Prime now include UNLIMITED photo storage (plus 1,000,000 songs, 40,000 movies & TV shows, a kindle lending library, and free 2-day shipping). Get your free 30 Day Trial here.
For more iPhone camera tutorials, also check out:
How to Use the iPhone’s Burst Mode to Get Perfect Photos of the Kids Every Time
Get Your Free Printable

Subscribe to our newsletter today and get our free printable... No More, "Mom, I'm Bored!"